What is a cable joint?
A cable joint is a device or method used to connect two or more electrical cables together to ensure continuous electrical conductivity and mechanical strength. Its primary role is to ensure a continuous flow of electricity by securely joining conductors and providing insulation and protection against environmental elements like moisture and mechanical stress. Cable joints are essential for extending cable lengths, repairing damaged cables, and changing cable routes in underground or overhead power distribution systems.
Types of Cable Joints
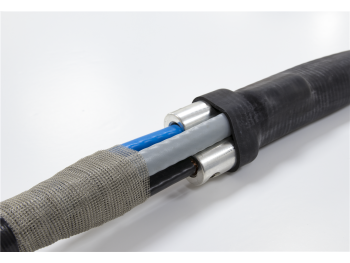
Straight Joint (Straight-Through Joint):
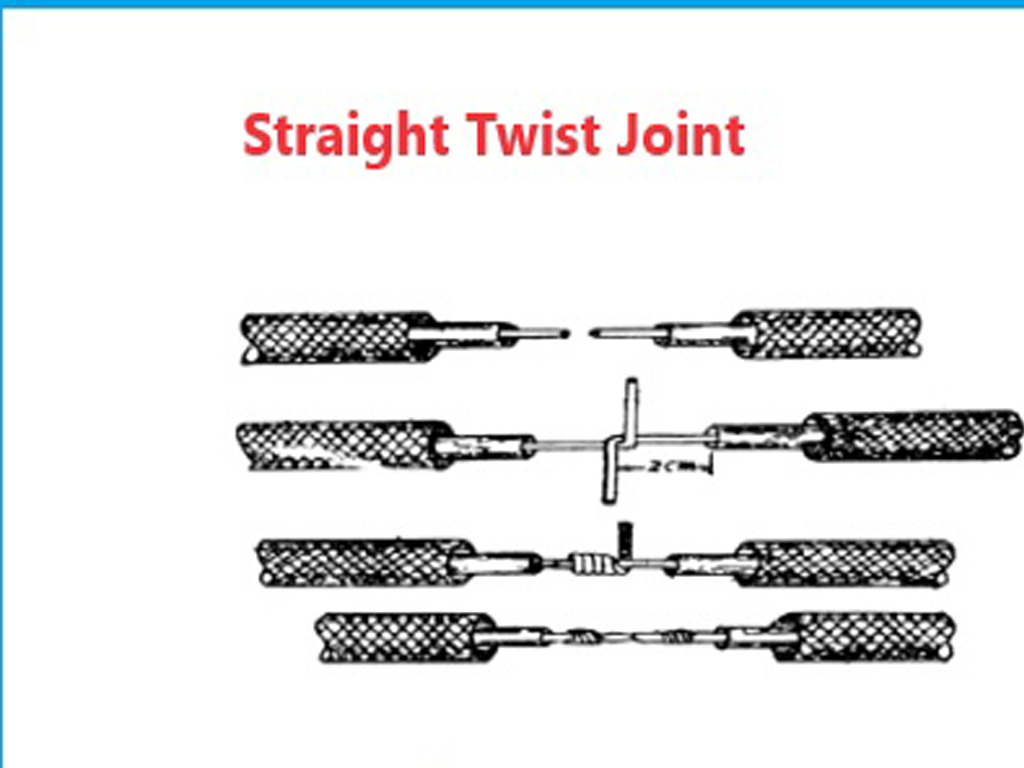
Used to connect two lengths of cable of the same type and size to extend their length or repair a damaged section, creating a seamless and continuous electrical path.
T-Joint (Tee Joint):
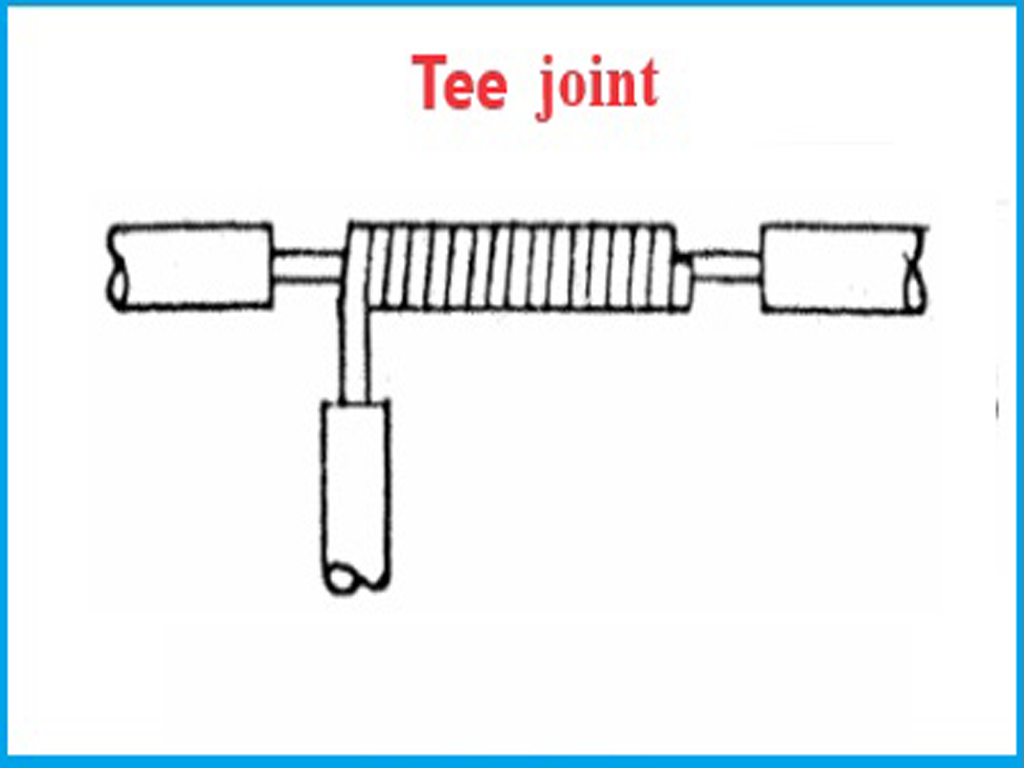
Used to connect a branch conductor to a main conductor, forming a “T” shape. Common in overhead distribution lines for tapping electrical energy.
Y-Joint:
Similar to a T-joint but creating a “Y” shape for branching.
Pot-End Joint (Termination Joint):
Used to terminate the end of a cable, often for connection to equipment, switch gear, or overhead lines. These can be for indoor or outdoor applications.
Heat Shrink Joints:
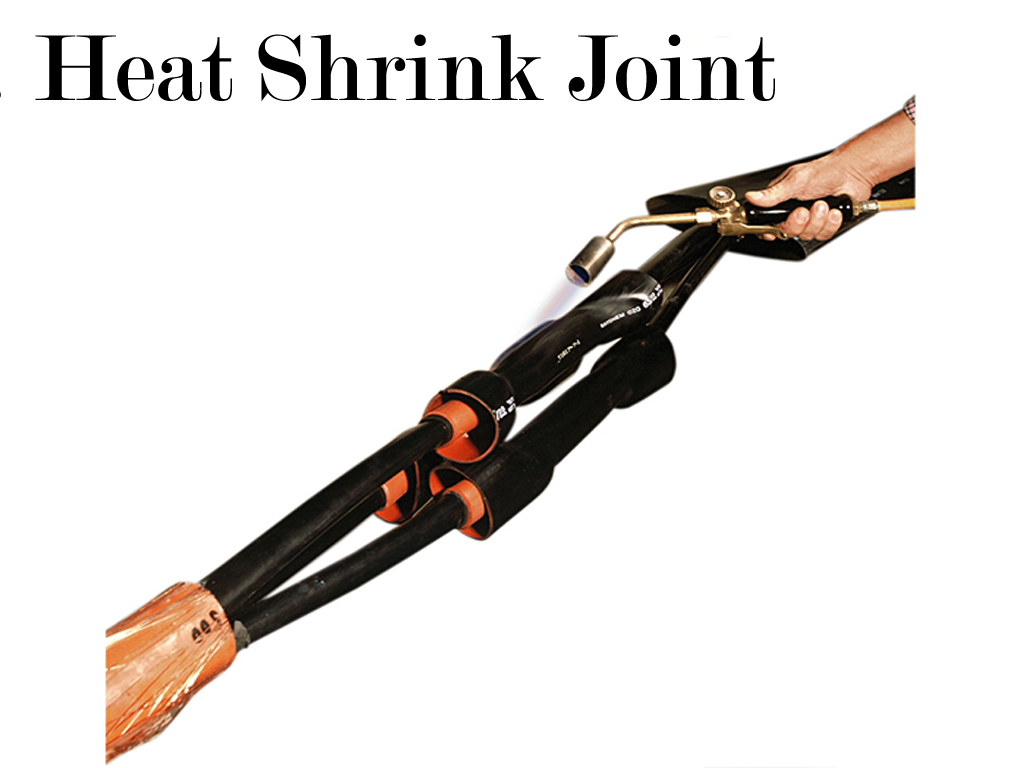
These use specially designed sleeves that shrink when heated (with a heat gun or torch), creating a secure and insulated connection. They offer good electrical insulation and mechanical protection and are widely used across various voltage levels.
Cold Shrink Joints:
These utilize pre-expanded rubber or silicone sleeves that are positioned over the cable joint and then allowed to contract (by removing a supporting core) to form a tight and reliable connection without the need for heat. They are easy to install and offer excellent insulation and environmental sealing.
Resin (Cast Resin) Joints:

In this method, the joint cavity is filled with a special resin compound that hardens to provide a solid, protective, and often waterproof enclosure. Commonly used for underground or high-voltage cables due to their robust insulation and protection against moisture and contaminants.
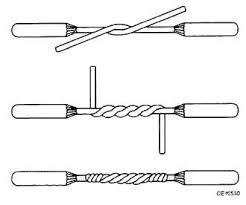
Married Joint (Twisted Joint):
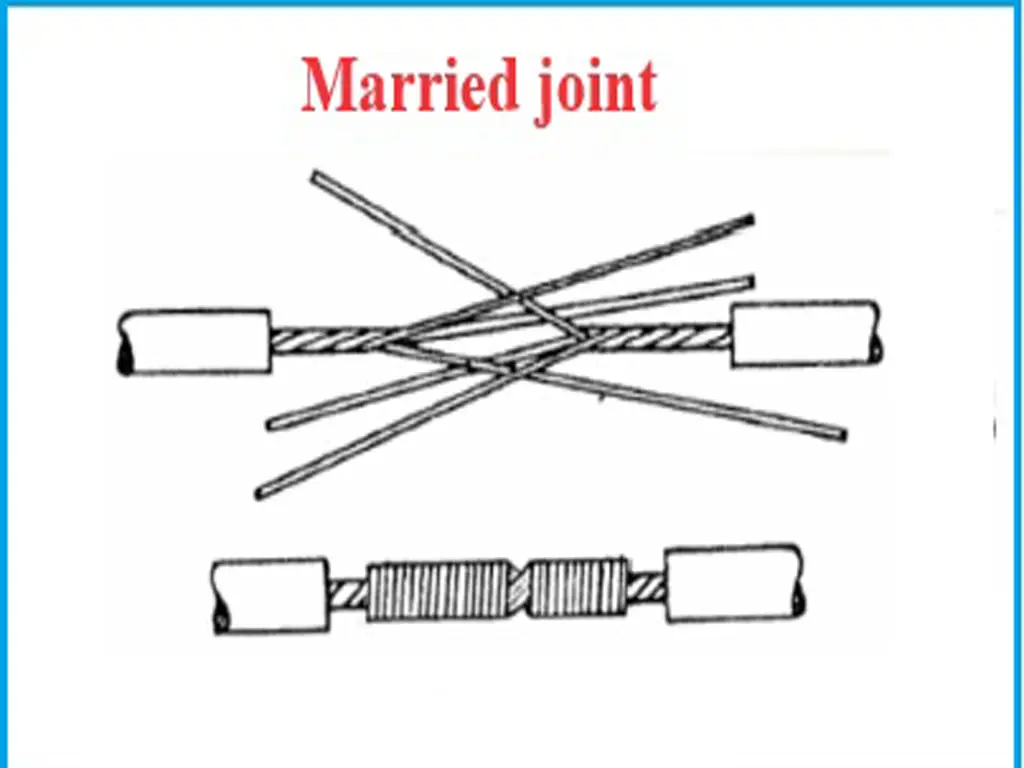
Involves intertwining wires, often followed by soldering. Used for multi-strand cables where compactness and good conductivity are needed, but offers less mechanical strength.
Rat-Tail Joint (Twist Splice/Pig-tail Splice):
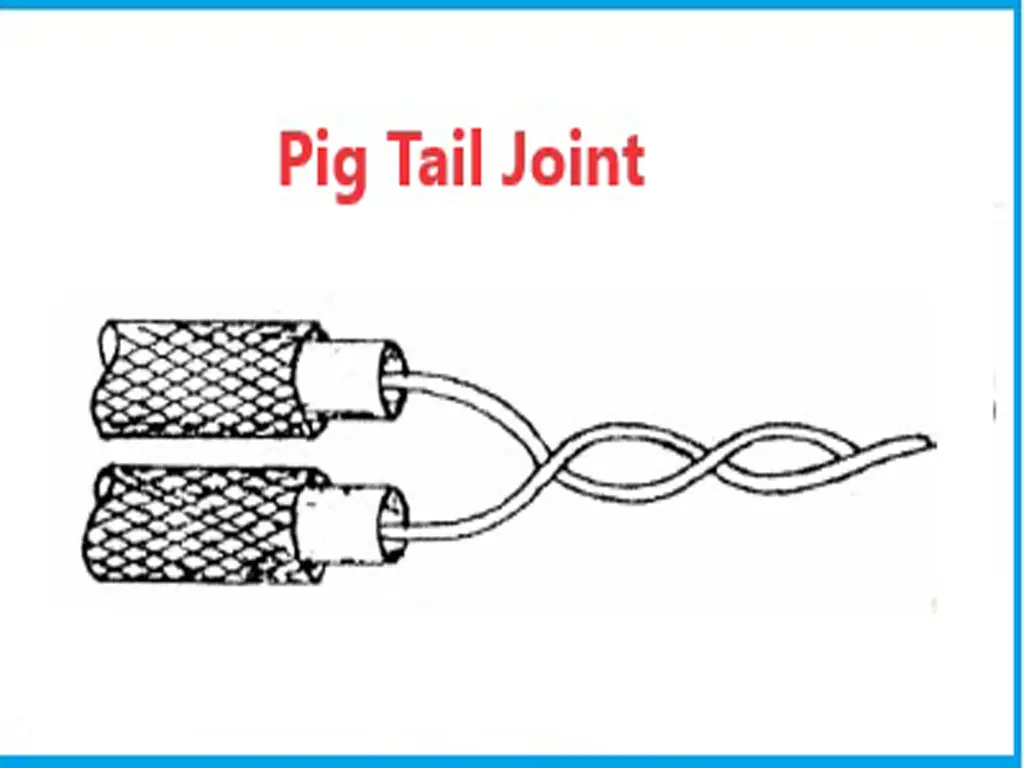
Basic splice for solid or stranded wires, where two or more bare wires are wrapped symmetrically.
Britannia Joint:
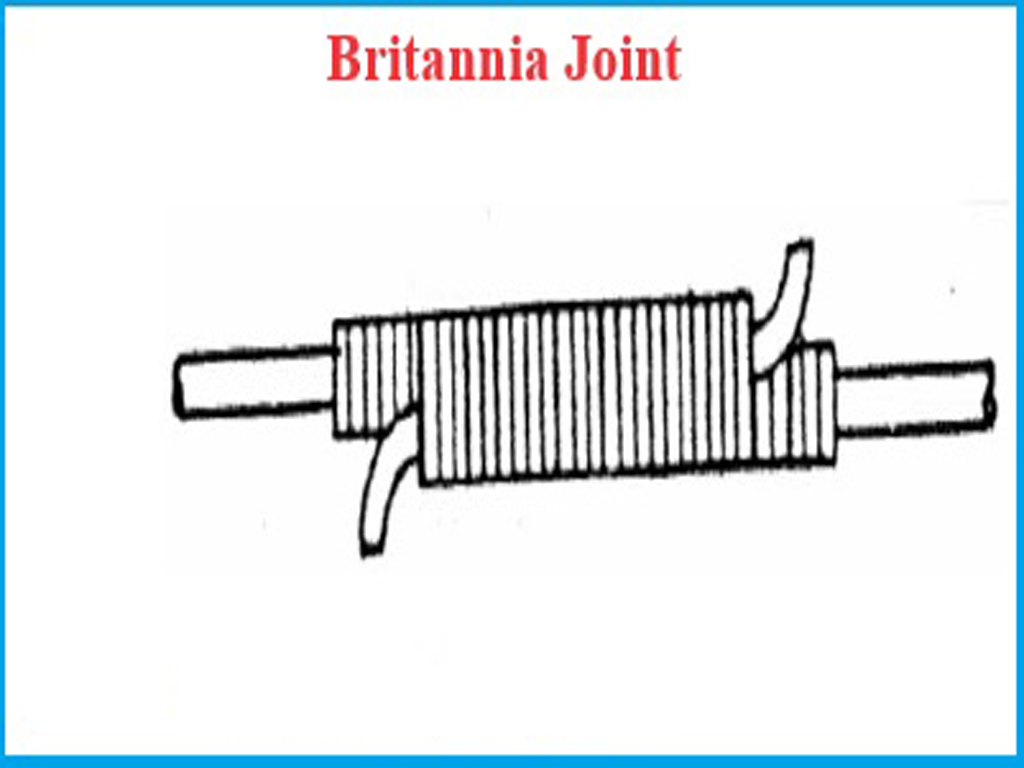
A compression joint often used for larger conductors, involving metal plates bolted together with a seal.
Western Union Joint (Lineman’s Splice):
Designed for strong connections, often in applications needing to withstand mechanical stress.
Solder Lock Joint:
Wires are joined and then soldered for added strength and conductivity.
Tools Used for Cable Jointing
- Cable Stripper – for insulation removal
- Crimping Tool – to crimp connectors
- Insulation Tape / Heat Shrink Tubes – for insulation
- Soldering Kit (if needed)
- Cable Jointers Knife – precise stripping and trimming
- Multimeter – for continuity and insulation resistance check
- Compression Tool – for large power cables
- Cleaning Materials – alcohol wipes, brushes, etc.
Steps for Jointing Electrical Cables:
Preparation:
- Switch off the power supply.
- Clean and inspect the cable.
- Strip outer sheath, armor (if any), and insulation to expose conductors.
Insulation Removal:
- Carefully remove the insulation without damaging the conductor.
Stripping and Cleaning:
- Remove outer sheath, armor (if any), and insulation carefully.
- Clean the conductor using emery paper or solvent.
Twisting:
- Align and twist or crimp the conductor / wire ends together using a connector or sleeve depending on the joint type.
Soldering:
- crimp connectors, wire nuts, split bolts, or solder the wire.
Insulation Rebuilding / Sealing:
- Apply insulation tape or heat-shrink tubing over the conductor joints / Apply mesh tape or other protective layers, followed by an outer sheath (e.g., PVC tape or a heat/cold shrink outer sleeve) to complete the mechanical protection and sealing of the joint.
- Ensure proper insulation to prevent electrical faults. This step is critical for electrical insulation and preventing short circuits.
- Ensure the joint is sealed against moisture and other environmental factors. This might involve applying mastic or other sealing compounds.
Final Testing:
- After the joint is completed, perform rigorous testing to verify its integrity and performance.This may include electrical conductivity tests, insulation resistance tests, and other relevant assessments to ensure the joint meets the required standards and provides reliable performance.
Qualities or Characteristics of a Good Cable Joint
A good cable joint ensures reliable electrical continuity, mechanical strength, and insulation integrity. Below are the essential qualities or characteristics of a good cable joint:
Electrical Continuity
- The joint should maintain the same current-carrying capacity as the original cable.
- Low resistance connection to prevent overheating or voltage drop
Mechanical Strength
- It must withstand mechanical stress, vibrations, pulling forces, and bending.
- The joint should be strong and durable enough to handle load conditions.
Insulation Integrity
- The joint must provide adequate insulation to avoid short circuits or electric shocks.
- Should be moisture-proof, dustproof, and resistant to environmental degradation (like UV, oil, or chemicals).
Moisture Resistance
- It should be waterproof or weatherproof, especially in outdoor or underground installations.
- Moisture can cause tracking, corrosion, or insulation failure.
Compatibility
- Materials used in the joint should be chemically and thermally compatible with the cable.
- It should suit the cable type (XLPE, PVC, paper-insulated, etc.) and voltage level.
Thermal Stability
- Should operate efficiently at normal and overload temperatures.
- Must withstand thermal cycling without cracking or loosening.
Ease of Installation
- The jointing process should be straightforward, time-saving, and require minimal special tools.
- Clear instructions and minimal training should be needed.
8. Size and Shape
- Compact enough to fit in confined spaces (like trays or ducts).
- Should not excessively increase the cable diameter or disturb the route.
Safety
- The joint should be safe to touch (if required), with no exposed conductors.
- Should comply with relevant safety standards (e.g., IEC, IEEE)
Tested and Certified
- Should pass dielectric, insulation resistance, impulse, and mechanical tests.
- Certified by recognized bodies (e.g., ISO, ASTM, IEC).